
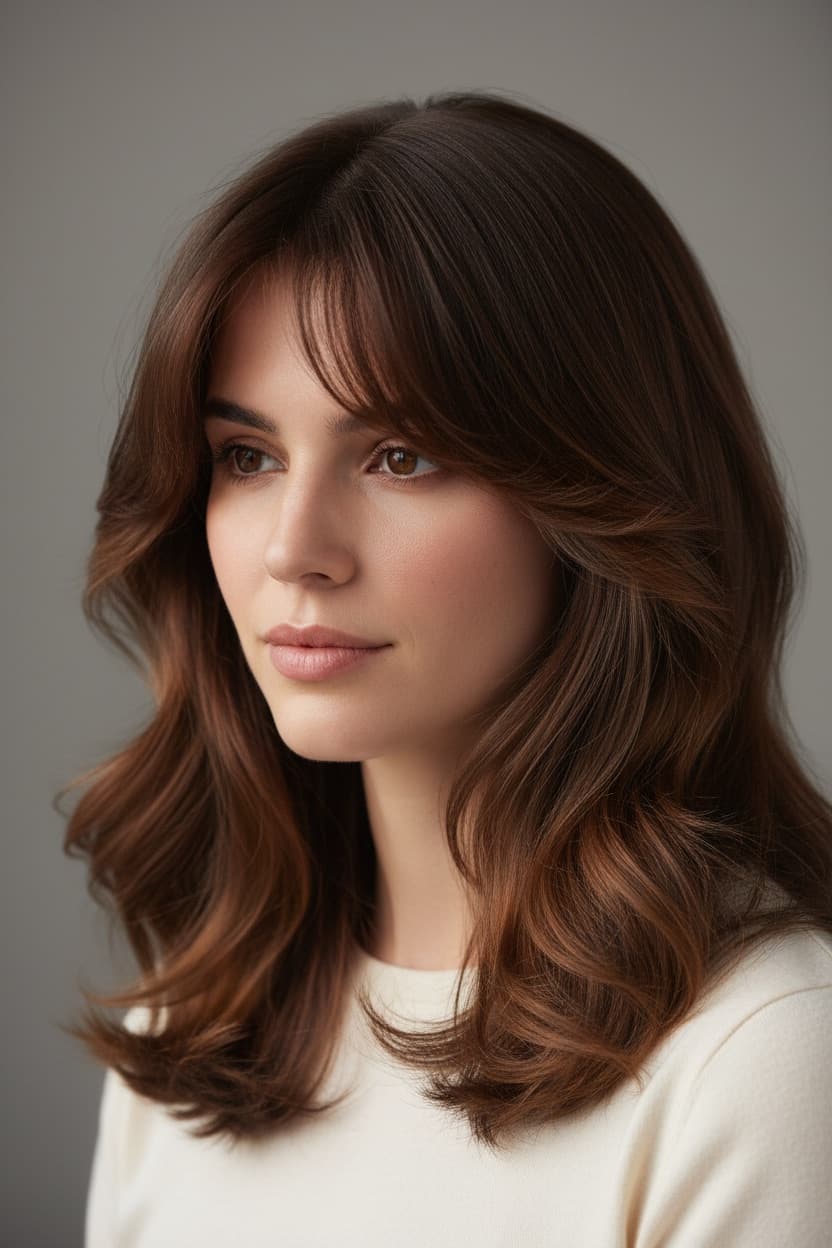
Here is the prompt most people are looking for. Upload a clear, front-facing photo, then paste this:
Restyle only the hair in this photo to [describe the cut — e.g. "long layers with a curtain fringe"], with [chin / collarbone / mid-back] length and [sleek and straight / soft blowout waves / natural loose curls] texture. Parting: [centre / deep side / curtain].

Keep the hair colour as it is in the original photo. Preserve my facial identity, bone structure, eye colour, skin tone, and natural skin texture completely — do not alter any facial feature, do not slim the face or jaw. Keep the same clothing, background, pose, and lighting direction.

Render the new hair with realistic strand detail, natural shine, and a hairline that sits correctly on my actual forehead. Output: 4K ultra-high definition photograph, looks like a real salon result, not a wig or a paste-on.
Two words in there are doing most of the work: "only" and "preserve". Drop either one and ChatGPT will hand you back a photo of a slightly different, slightly more symmetrical person wearing the haircut you asked about. That is the single reason most AI hairstyle previews are useless — you cannot judge a cut on a face that isn't yours.
Why ChatGPT redesigns your face when you only asked about your hair
ChatGPT does not edit your photo. It looks at your photo, builds an internal description, and paints a new image from that description. Every pixel is regenerated, including the ones you never mentioned.
So when the instruction is "give me a bob", the model is free to satisfy that instruction in the most plausible way it knows — and the training data for "woman with a good bob" is full of professionally shot, retouched, symmetrical faces. Without constraints, it drifts toward that average. In practice you get four specific distortions, almost every time:
| What drifts | What it looks like | Why it matters |
|---|---|---|
| Jaw and cheeks | Slimmer, more tapered | The cut looks better than it will on you |
| Eyes | Slightly larger, more open | You're judging a different face |
| Hairline | Lower, straighter, fuller | Fades and fringes will sit differently in reality |
| Skin | Smoothed, poreless | Makes the whole image read as fake |
The preserve clause below blocks all four. It's the same clause that powers face-safe photo editing in ChatGPT — hairstyle try-ons are just one application of it.
The preserve clause, annotated
Preserve my facial identity,        ← identity anchor: locks who the person is
  bone structure,                   ← blocks jaw slimming and cheek tapering
  eye colour,                       ← blocks eye-colour drift
  skin tone,                        ← blocks lightening or tanning
  and natural skin texture          ← blocks the plastic-skin effect
  completely.
Do not alter any facial feature,    ← catch-all negative constraint
  do not slim the face or jaw.      ← names the most common failure explicitly
Keep the same clothing,             ← stops the model restyling the whole photo
  background, pose,
  and lighting direction.
Naming the failure explicitly — "do not slim the face or jaw" — works noticeably better than the generic version alone. Models respond to specific prohibitions more reliably than broad ones.
12 copy-paste hairstyle prompts
Every prompt assumes you've uploaded a clear photo first. Front-facing, good light, hair not tied back if you're changing the cut.
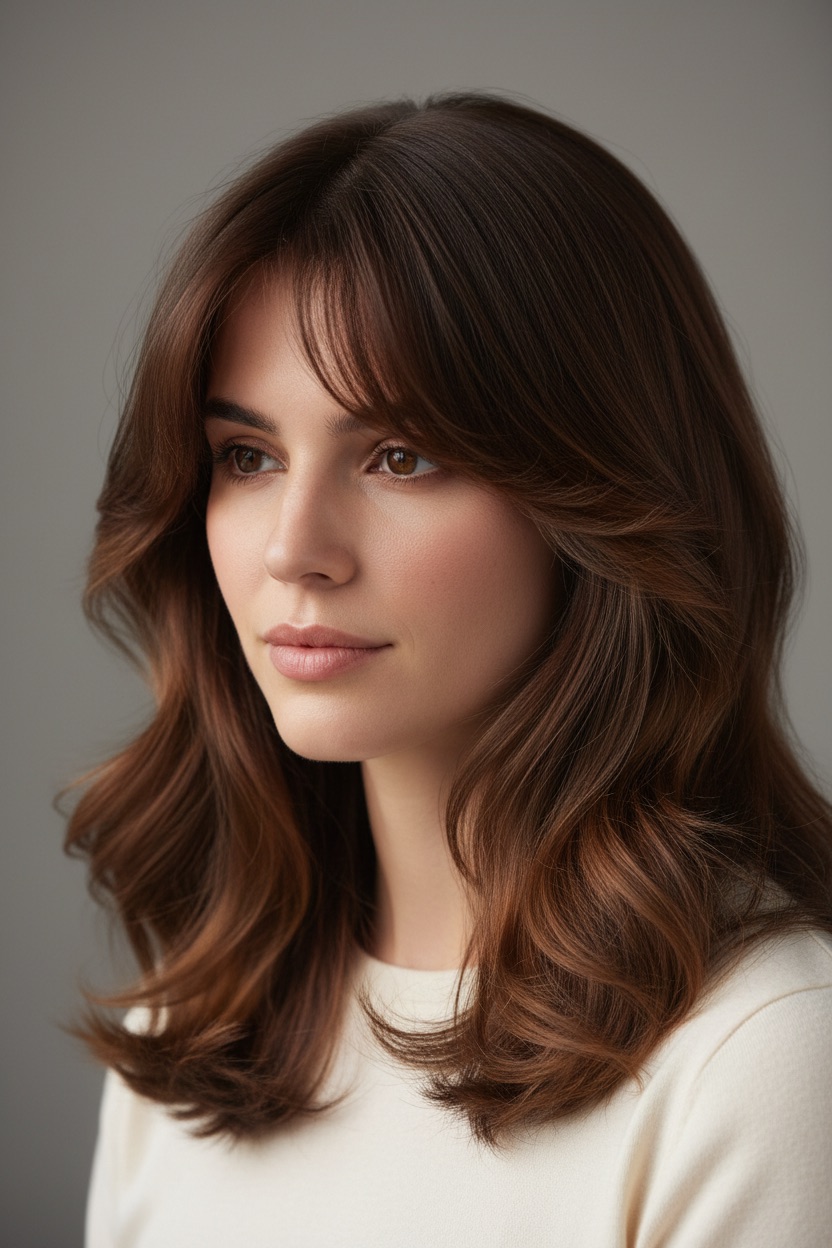
1. Women's cut — any length or shape
Restyle only the hair in this photo to [a blunt collarbone bob / long layers with a curtain fringe / a French bob with bangs], with [length] length and [texture] texture. Parting: [centre / deep side / curtain]. Keep the hair colour as it is in the original photo. Preserve my facial identity, bone structure, eye colour, skin tone, and natural skin texture completely — do not alter any facial feature, do not slim the face or jaw. Keep the same clothing, background, pose, and lighting direction. Render the new hair with realistic strand detail, natural shine, and a hairline that sits correctly on my actual forehead. Output: 4K ultra-high definition photograph, looks like a real salon result, not a wig or a paste-on.
▶ Try this as a fill-in template →
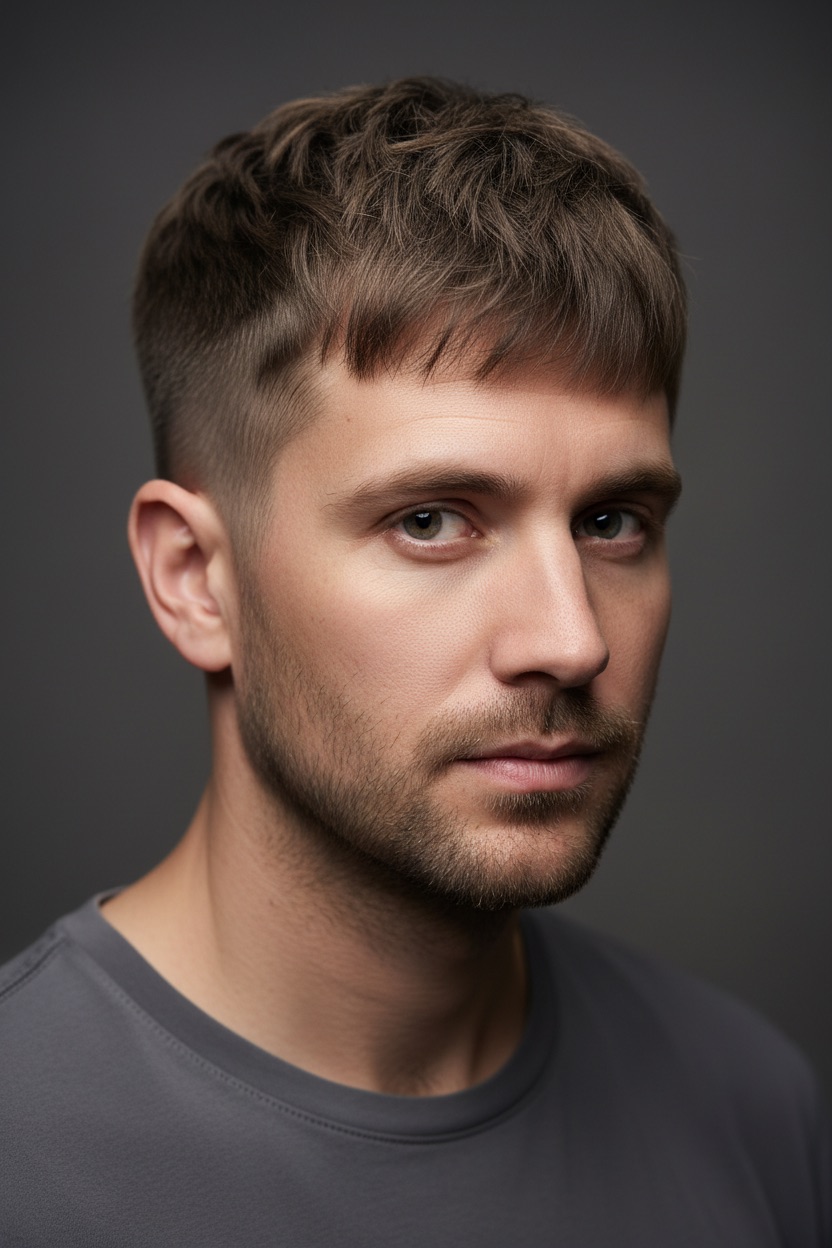
2. Men's cut — fades, crops, grown-out length
Restyle only the hair in this photo to [a mid skin fade / a textured French crop / a classic side part], with [top length] on top and [side length] on the sides and back. Styling: [matte forward with a light clay / swept back with pomade shine / natural air-dried]. Beard: [keep exactly as in the photo / clean shaven / short tidy stubble].

Keep the hair colour as it is. Preserve my facial identity, bone structure, eye colour, skin tone, and natural skin texture completely — do not alter any facial feature, do not sharpen or reshape the jawline. Keep the same clothing, background, pose, and lighting direction.

Render a realistic hairline that follows my actual hairline and temple recession, with visible individual strands at the edges. Output: 4K ultra-high definition photograph, looks like a real barber result.
▶ Try this as a fill-in template →
The hairline instruction is not optional here. Ask for a fade without it and ChatGPT will give you a dense, low, perfectly straight hairline — which tells you nothing about how the fade will actually sit on your temples.
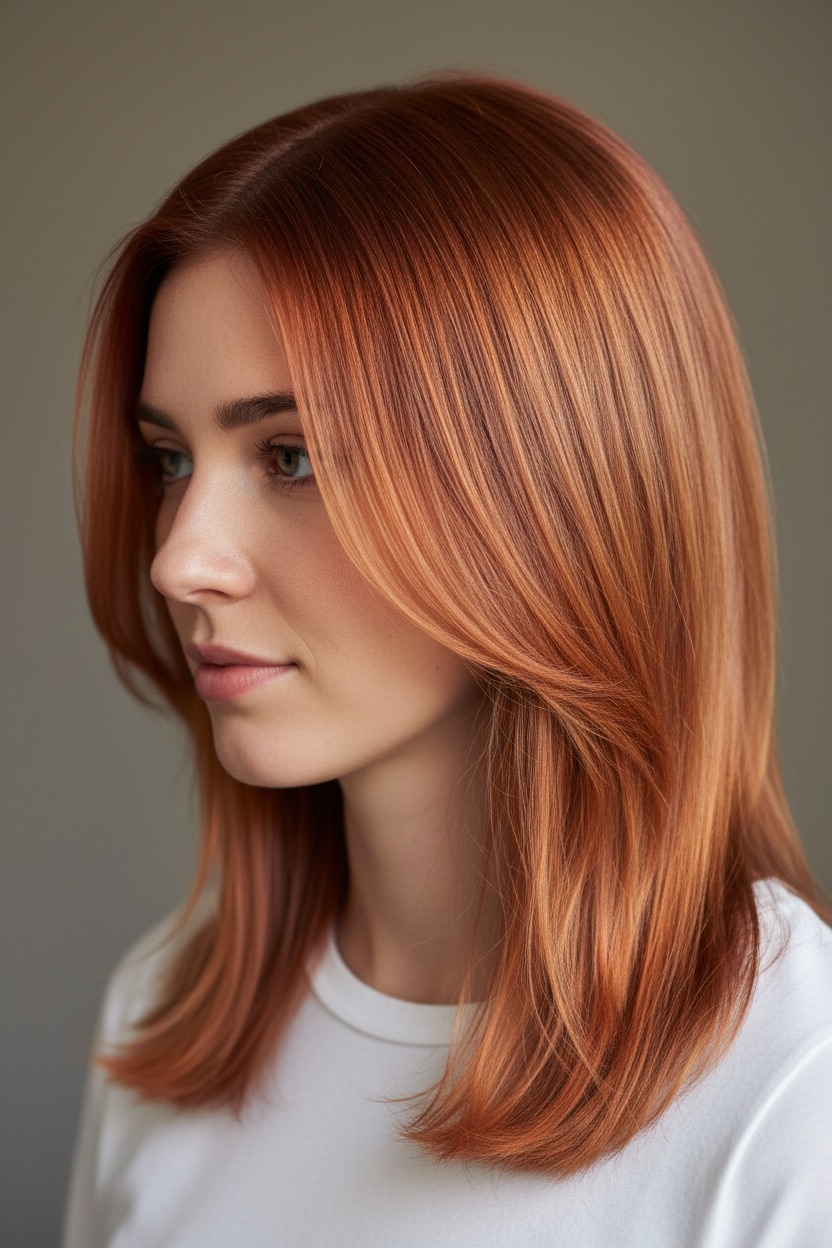
3. Hair colour, cut unchanged
Change only the hair colour in this photo to [warm copper / ash blonde / chocolate brown with caramel / platinum], applied as [a full single-process colour / a soft balayage / face-framing money-piece highlights]. Root treatment: [a soft shadow root / fully saturated to the scalp / a deliberate grown-out root].

Keep the exact same haircut, length, parting, and styling as in the original photo — change nothing about the shape of the hair. Preserve my facial identity, bone structure, eye colour, skin tone, and natural skin texture completely. Keep the same clothing, background, pose, and lighting direction.

Render the colour with realistic tonal variation between strands, natural shine where the light hits, and shadow depth underneath — not a flat single-tone fill. Make sure the colour reads correctly against my skin undertone. Output: 4K ultra-high definition photograph, looks like a real salon colour service.
▶ Try this as a fill-in template →
Note the depth in that example — darker at the root, brighter through the ends, visible variation strand to strand. That is what the "not a flat single-tone fill" instruction buys you. Without it the same prompt returns something closer to a paint bucket.
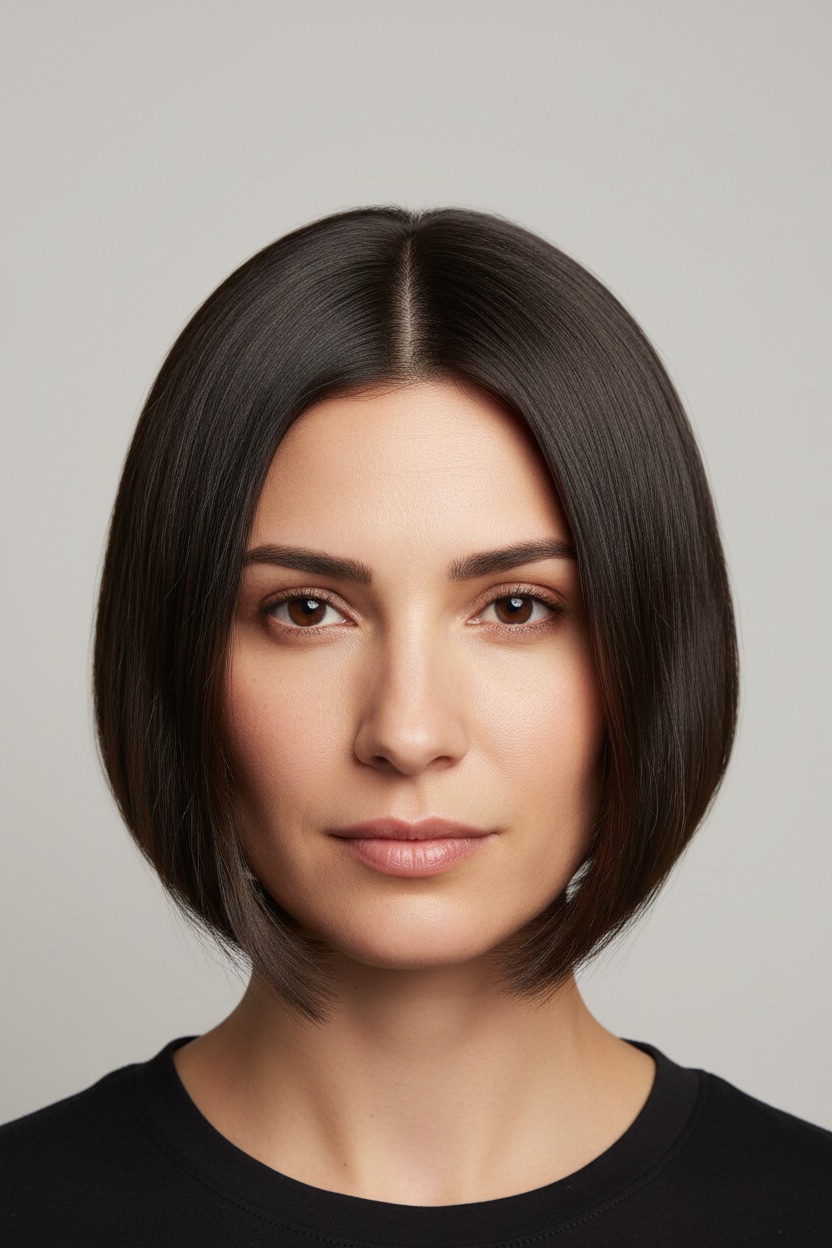
4. The commitment cut — bob, pixie, lob
This is the one worth being careful with, because it's the cut you can't reverse.
Cut the hair in this photo short to [a blunt chin-length bob / a textured pixie cut / a shoulder-grazing lob]. The hair should end at [the jawline / just below the chin / the collarbone]. Styling: [sleek and glossy / tousled with a bend / soft bouncy blowout]. Nape and neckline: [a clean blunt line / a soft tapered nape / slightly stacked at the back].

Keep the hair colour as it is. Preserve my facial identity, bone structure, eye colour, skin tone, and natural skin texture completely — do not slim my face, sharpen my jaw, or lengthen my neck to flatter the cut. Show the cut honestly on my real head shape and face proportions.

Keep the same clothing, background, pose, and lighting direction. Render realistic weight and movement in the shorter hair, with individual strands visible at the ends. Output: 4K ultra-high definition photograph, honest salon-consultation preview.
▶ Try this as a fill-in template →
"Do not lengthen my neck" reads like an odd thing to have to say. It isn't — short cuts expose the neck, and models trained on editorial hair photography have absorbed the habit of elongating it. You will get a flattering lie unless you block it.
5. Bridal and event updos
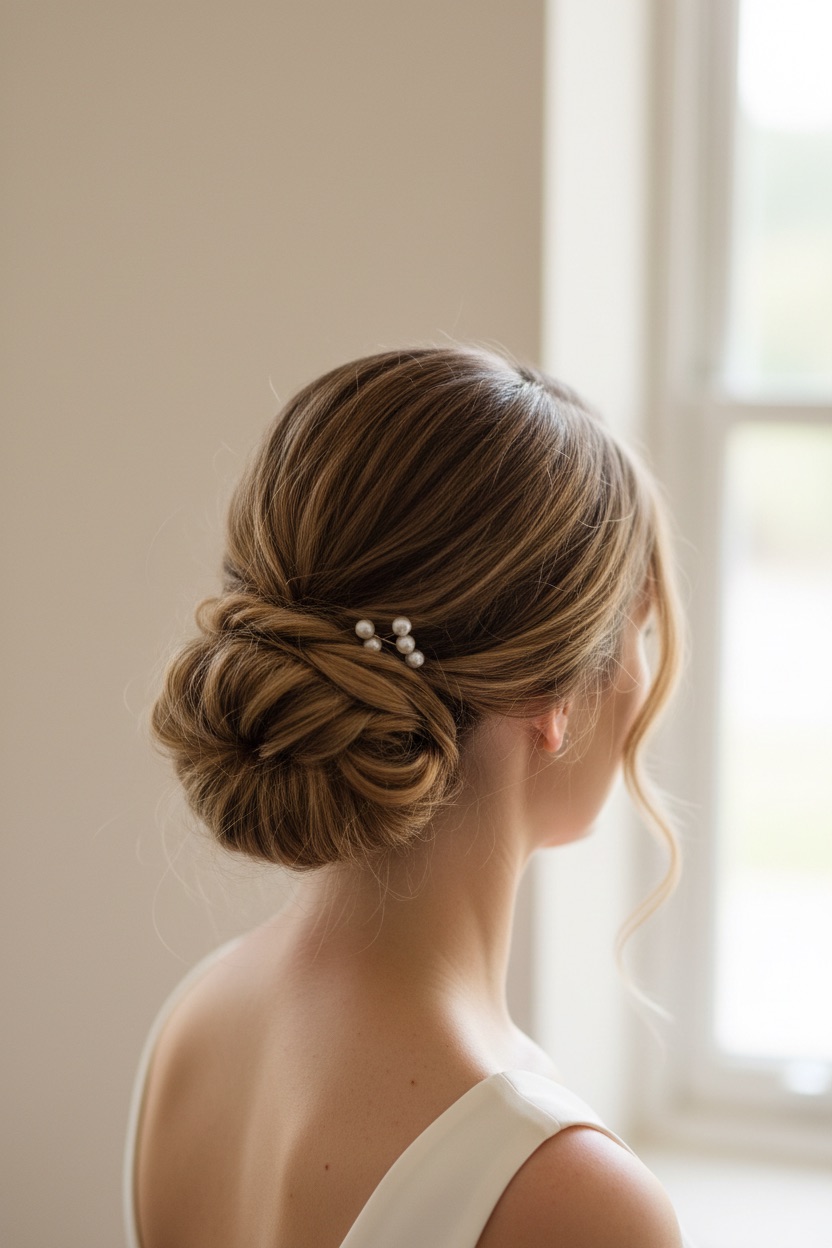
Restyle only the hair in this photo into [a low textured chignon / a soft romantic half-up half-down / a sleek high bun / loose Hollywood waves], suitable for [a wedding day / a black-tie event / a reception]. Finish: [soft and undone / polished and sleek / deliberately piecey]. Face-framing detail: [two loose tendrils at the temples / a soft swept fringe / pulled fully back and clean]. Accessory: [none / a small pearl pin cluster / a thin gold vine / a simple veil comb].

Keep the hair colour as it is. Preserve my facial identity, bone structure, eye colour, skin tone, and natural skin texture completely — do not alter any facial feature and do not add makeup that changes how I look.

Keep the same clothing, background, pose, and lighting direction. Render realistic hair structure: visible pin placement logic, natural tension at the scalp, individual strands and a few soft flyaways rather than a smooth solid mass. Output: 4K ultra-high definition photograph, looks like a real hair trial, not a rendered illustration.
▶ Try this as a fill-in template →
Ask for the three-quarter rear angle, as in that example. A front-facing shot of an updo shows you almost nothing about the part of the style everyone else will be looking at.
The "do not add makeup" line matters more than it seems. Ask for a bridal updo and ChatGPT will usually deliver a full bridal makeup look with it, which changes the face and defeats the point of the preview.
6. Curl type and texture
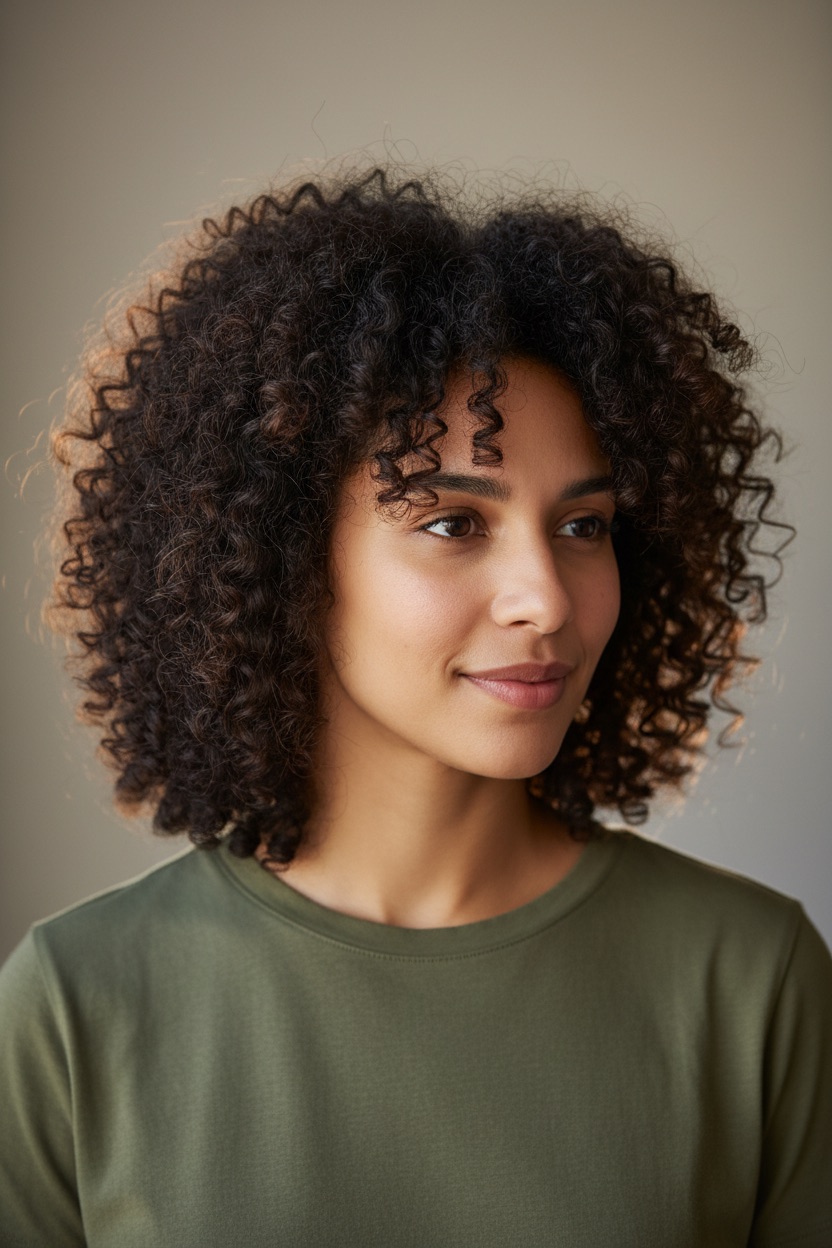
Change only the hair texture in this photo to [loose 2B waves / defined 3A curls / tight 4C coils / bone-straight], styled as [worn loose / a high puff / box braids / a wash-and-go / a silk press]. Volume: [close to the head / moderate lift at the roots / full and voluminous]. Definition: [highly defined and separated / soft and undefined / freshly diffused].

Keep the hair colour and approximate length as they are. Preserve my facial identity, bone structure, eye colour, skin tone, and natural skin texture completely — do not alter any facial feature and do not lighten my skin.

Keep the same clothing, background, pose, and lighting direction. Render the texture accurately: real curl clumps of varying sizes, visible individual strands, natural frizz at the crown, and honest volume rather than an idealised uniform pattern. Output: 4K ultra-high definition photograph, realistic hair texture.
▶ Try this as a fill-in template →
That example also shows the limit of the technique: the requested pattern was 3A, and what came back is tighter and denser than 3A. Curl-type numbers are the least reliable thing you can ask an image model for. Describe the curl you want — clump size, how far it stretches, how much frizz — rather than trusting the type number to land.
"Do not lighten my skin" belongs in this prompt specifically. Texture-change prompts have a documented tendency to shift skin tone along with hair type. Block it explicitly.
7. Side-by-side comparison sheet
Using the photo I uploaded, generate a single image laid out as a 2x2 grid showing me with four different hairstyles: [style 1], [style 2], [style 3], and [style 4]. Label each quadrant with the style name in small clean text at the bottom.

In every quadrant, preserve my facial identity, bone structure, eye colour, skin tone, and natural skin texture completely — the same face in all four, only the hair differs. Keep the same clothing, background, pose, and lighting in all four so the comparison is fair. Output: 4K ultra-high definition, consistent lighting across all quadrants.
The "keep the same lighting in all four" instruction is what makes this a comparison rather than four unrelated photos. Without it, one quadrant gets flattering light and wins for the wrong reason.
8. Grow-out timeline
Using the photo I uploaded, generate three images showing my hair at [3 months], [6 months], and [12 months] of growing out from my current [current cut], assuming average growth of half an inch per month and [no trims / a trim every 10 weeks].

Preserve my facial identity, bone structure, eye colour, skin tone, and natural skin texture completely in all three. Show realistic in-between awkwardness — the shape as it actually grows, not an idealised longer version. Keep the same clothing, background, pose, and lighting. Output: 4K ultra-high definition photographs.
"Show realistic in-between awkwardness" is the whole prompt. The default output skips the grow-out phase entirely and shows you the destination, which is the part you already knew you wanted.
9. Fringe and bangs test
Add [blunt bangs / curtain bangs / wispy French bangs / a deep side-swept fringe] to the hair in this photo, sitting at [eyebrow / just below the brow / cheekbone] length. Keep the rest of the hair — length, colour, parting behind the fringe, styling — exactly as it is.

Preserve my facial identity, bone structure, eye colour, skin tone, and natural skin texture completely. Do not shorten my forehead or change my hairline to make the fringe sit better — show how it falls on my actual forehead height. Keep the same clothing, background, pose, and lighting direction. Output: 4K ultra-high definition photograph.
Forehead height is the entire variable in a fringe decision, and it's exactly what the model will quietly adjust if you let it.
10. Grey coverage or grey blending
Change only the grey in the hair in this photo: [cover it completely with [colour] / blend it into a soft salt-and-pepper / let it grow out fully to natural grey]. Keep the exact same haircut, length, parting, and styling.

Preserve my facial identity, bone structure, eye colour, skin tone, and natural skin texture completely — do not make me look younger or older beyond the hair change, and do not smooth my skin. Keep the same clothing, background, pose, and lighting direction. Output: 4K ultra-high definition photograph.
"Do not make me look younger" is load-bearing. Grey-coverage prompts trigger a broader de-aging response — softened lines, plumper skin — that makes the result unusable as a decision aid.
11. Wig or extension preview
Show the photo I uploaded with [a shoulder-length wig in [colour and texture] / 20-inch tape-in extensions matched to my colour / a half-wig adding volume at the crown] fitted realistically.

Preserve my facial identity, bone structure, eye colour, skin tone, and natural skin texture completely. Render a realistic lace-front hairline with baby hairs and a natural density gradient — do not paste the hair on as a solid cap. Show where the extensions blend with my own hair. Keep the same clothing, background, pose, and lighting direction. Output: 4K ultra-high definition photograph.
12. The stylist reference sheet
Once you've picked a direction, this converts the image into something a stylist can actually work from:
Look at the hairstyle image you just generated. Write the salon brief a stylist would need to reproduce it on me: the recognised name of the cut, length in inches, where the layers start, how the face-framing pieces should sit, the parting, and the styling products and technique used for this finish.

Then list the three things most likely to go wrong when a stylist attempts this on my hair type, and what to say to prevent each one.
The four failure modes, and the follow-up that fixes each
Everything goes wrong in one of four ways. Reply in the same chat — don't start over.
The face changed.
The face changed. Redo this with my face identical to the photo I uploaded — same bone structure, same jaw width, same eyes, same skin texture. Change only the hair. Nothing else in the image should differ from my original photo.
The hair looks pasted on.
The hair reads as a wig — the hairline is too dense and sits too low. Redo it following my actual hairline from the original photo, with a soft density gradient at the temples, a few individual strands breaking the edge, and scalp faintly visible at the part.
The colour is flat.
The colour is a flat single tone. Redo it with realistic depth: darker underneath, brighter where light hits the top surface, and visible variation between individual strands. Match how salon colour actually reflects light.
It's too flattering to be useful.
This is idealised. Redo it honestly: my real face width, my real hair density, my real hairline, normal skin texture with visible pores, and the frizz and flyaways I'd actually have. I need to make a real decision from this, not see a best-case render.
That last one is the most valuable prompt in this guide. The default behaviour of every image model is to flatter you, and a flattering hairstyle preview is worse than no preview — it's how people end up in a chair asking for a cut that was never going to work.
ChatGPT vs. dedicated AI hairstyle apps
Worth being straight about the trade-off:
| ChatGPT / Gemini prompts | Dedicated hairstyle apps | |
|---|---|---|
| Style range | Anything you can describe | A fixed preset library |
| Face preservation | Good, but only with a preserve clause | Usually stronger — purpose-built |
| Iteration | Conversational — "shorter, less volume" | Re-pick from the menu |
| Cost | Included in your existing subscription | Usually a separate subscription |
| Honesty | Flatters unless you block it | Also flatters |
The real advantage of the prompt approach is the follow-up. When an app gives you a bob you don't like, you pick a different preset. When ChatGPT gives you a bob you don't like, you can say "two inches longer, less bounce at the ends, and shift the part to the left" and get exactly that. Hair decisions are made in small adjustments, and only one of these two approaches supports them.
If you want the recommendation before the preview, the hairstyle advisor prompt analyses your face shape and hair texture and returns three named cuts with the salon script for each. Run that first, then preview its top pick with the prompts above.
Practical notes
Your photo determines your result. Front-facing, eye-level, even light, hair down and visible. A photo shot from below or in hard overhead light will produce a bad preview no matter how good the prompt is — and you'll blame the cut.
Do one variable at a time. Change the cut, then the colour, then the texture, in separate turns. Change all three at once and you can't tell which one you're reacting to.
Generate three, not one. The same prompt run three times gives three slightly different interpretations. If a cut looks good in all three, that's signal. If it only works in one, that's a rendering accident.
Take the image to the stylist as a starting point, not a spec. A stylist can tell you in ten seconds that your density won't hold that shape. The image is there to make sure you're both discussing the same haircut — that's a genuinely useful thing, and it's all it is.
Related prompts and guides: