
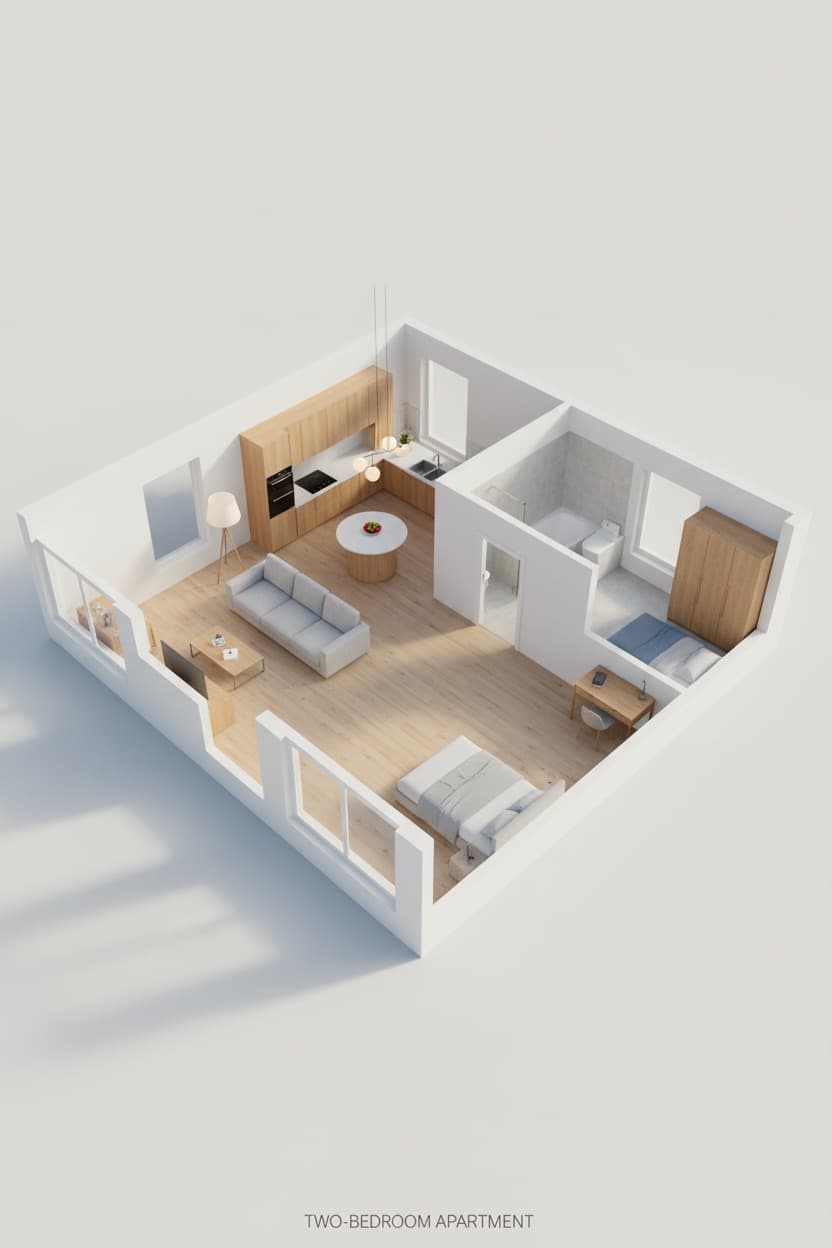
Floor Plan to 3D Walkthrough Model
Convert a 2D floor plan or blueprint into a correctly-scaled, room-by-room editable Blender model, then render it.
imageadvancedArchitectural Rendering
# Prompt Template
You are working as a 3D modelling agent with Blender open. Using the uploaded floor plan, build a correctly-scaled 3D model of the dwelling and render it.
STEP 1 — Establish scale first. Before modelling anything, find the scale: read the dimension strings, the scale bar, or a known reference such as a standard door leaf at 0.9m or a stair tread at 0.25m. State the scale you derived and the resulting overall footprint in metres. If the plan carries no dimensions at all, say so and assume a standard door width, then proceed. Getting this wrong invalidates everything downstream.
STEP 2 — Trace the plan. Extrude every wall to a floor-to-ceiling height of 2.7m. Wall thickness: 300mm external, 100mm internal. Reproduce the plan exactly — every room, every wall, every opening in the position shown. Do not re-plan the layout, merge rooms, straighten walls or 'fix' anything you consider awkward. Cut door and window openings at the positions marked, using standard heights: doors 2.1m, window heads 2.1m with sills at 0.9m unless the plan says otherwise.
STEP 3 — Name every room. Each room must be a separate, named object matching its label on the plan: Living, Kitchen, Bedroom_1, Bedroom_2, Bathroom, Hall, and so on. Walls, Floor, Ceiling, Doors and Glazing are each their own named group. Nothing merged.
STEP 4 — Fit out. Furnish every room appropriately for its label. Every item scaled to real dimensions — a 3-seat sofa is 2.1m, a double bed is 1.4m by 2.0m, a kitchen worktop is 0.9m high and 0.6m deep. Wrong furniture scale is the fastest way to make a plan render read as fake.
STEP 5 — Materials and light. Floors: pale oak throughout, light grey stone in the bathroom. Walls matte off-white unless the plan indicates otherwise. Lighting: bright even daylight entering from two sides plus warm practical lamps, with daylight entering through the window openings in the positions you cut, plus warm practical lights where the plan shows fittings.
STEP 6 — Output and view. Render a 45-degree cutaway dollhouse view with the walls cut at waist height. Save the .blend and export a GLB.
COMPLETION CRITERIA — render, inspect, and verify against the plan: room count matches, room adjacencies match, every door and window is in the position shown, the footprint matches the scale you derived, and furniture reads at plausible human scale. Revise and re-render until all five pass, then report the derived scale, the overall footprint, and every room object you named.
Negative prompt:
re-planned layout, merged rooms, wrong scale, oversized furniture, missing rooms, doors in wrong positions, single merged mesh, distorted geometry, watermark, text, low quality
# Customize Variables
Share:
# Tags
floor plan to 3d modelfloor plan to 3d2d floor plan to 3dchatgpt prompt for 3d floor planhouse plan prompt for chatgptchatgpt astraastra blenderblueprint to 3d
# Related Prompts
# Related Articles
ChatGPT Astra Architecture Prompts — Photo to Editable 3D Model
Which of these five produce an editable 3D model and which produce an image, the full prompts, and the checks that make Astra iterate.
ChatGPT Image Prompts for 4K Quality
Master high-resolution AI image generation with proven prompt techniques.
Stunning AI Art with DALL-E & Midjourney
Complete guide to crafting prompts for breathtaking AI artwork.
Ultimate Guide to Prompt Engineering
Learn the principles behind crafting effective prompts for any AI tool.
newsletter.sh
# Weekly Best Prompts — Delivered Free
Get the 5 best ChatGPT prompts of the week, curated and ready to copy. No spam, unsubscribe any time.
$ No spam · Unsubscribe any time · Free forever